Need to use Telnet on your Mac? Only to find out at the most inopportune time that Telnet is no longer on MacOS? Well, take solace in the fact that you’re not alone. Telnet has been removed from modern versions of the system software starting from MacOS Mojave and newer. These instructions will work for MacOS Mojave and newer, including Sonoma and Sequoia (These are the steps that I have personally used to get Telnet back).
Installing Telnet on MacOS with Homebrew
The first way (which is the easiest) is to use Homebrew to install telnet.
Step 1: Install Homebrew (if not already installed)
If you don’t already have Homebrew on your machine, either follow step 1 below or navigate over to the website and follow their installation instructions. Once installed move on to step 2.
$ curl -O https://raw.githubusercontent.com/Homebrew/install/master/install.sh
Open and inspect the install.sh script to see and make sure what it does. And then run it.
$ ./install.sh
Step 2: Install Telnet
After installing Homebrew, install Telnet
$ brew install telnet
That’s it, get back to whatever you needed telnet for.
Installing Telnet on MacOS by Building Telnet from Source
This was the method I used. There are some prerequisite steps though, if you don’t already have them you’ll need to install the MacOS command line tools (step 1 below). If you already have them installed skip to step 2.
Step 1: Installing the command line tools
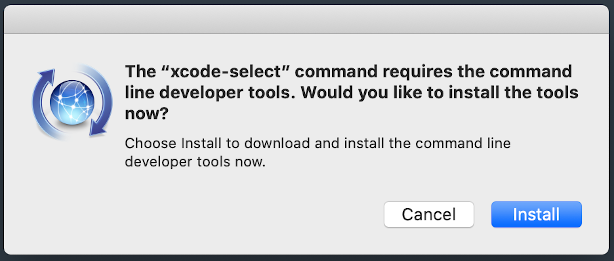
Open a terminal and enter the following line, you’ll then be shown a pop up prompt.
$ xcode-select --install
Click install when the prompt pops up.

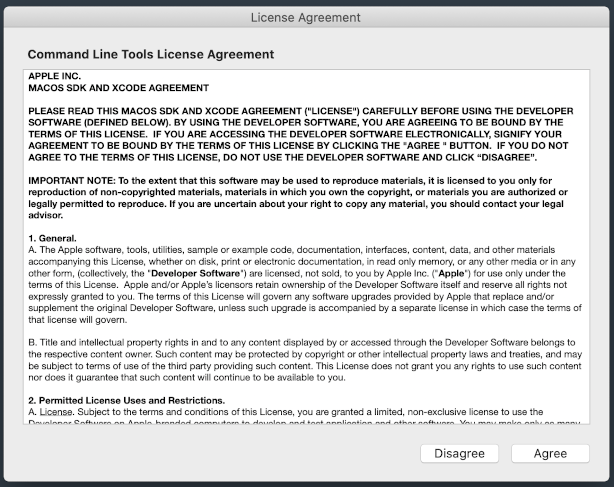
After that you’ll be shown a license which you’ll have to agree to in order to install.

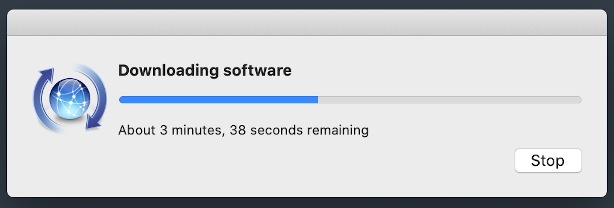
After that you’ll see the download progress and the install will happen after that. Unfortunately I forget to get screen shots of the following message boxes.

Step 2: Getting the Telnet source
For this step you’ll be getting the GNU network utilities navigate to the download page and find the latest source. At the time I’m writing this it’s 2.5:
$ curl -O https://ftp.gnu.org/gnu/inetutils/inetutils-2.5.tar.xz
Next grab the signature file and keyring file to verify:
$ curl -O https://ftp.gnu.org/gnu/inetutils/inetutils-2.5.tar.xz.sig
$ curl -O https://ftp.gnu.org/gnu/gnu-keyring.gpg
Finally verify:
$ gpg --verify --keyring ./gnu-keyring.gpg inetutils-2.5.tar.xz.sig inetutils-2.5.tar.xz
This should produce some output that says " Good signature from…" within it. If that’s not the case, your download isn’t good and I would not proceed any further.
Step 3: Extract the source
$ tar -xvf inetutils-2.5.tar.xz
Step 4: Configure and build
Now that the source is extracted change into the directory:
$ cd inetutils-2.5.tar.xz
Run the configure command:
$ ./configure
Run the make command to build:
$ make
Step 5: Install Telnet
And then install:
$ sudo make install
Telnet Alternatives - Command Line Tricks
Depending on your use case of Telnet you might be able to find an alternative tool to use.
Using it for network troubleshooting, to test if a port on a remote server is open:
telnet example.com 80
Trying 93.184.216.34...
Connected to example.com.
Escape character is '^]'.
^\^]
telnet> q
Connection closed.
Instead it would be possible to use netcat (nc). It’s a versatile and powerful command-line utility that can be used for reading from and writing to network connections using TCP or UDP. Netcat is often referred to as the “Swiss Army knife” of networking tools due to it’s ability to almost everything you can imagine in regards to TCP, UDP, or UNIX sockets.
Here’s an example of using it to test a remote server port:
nc -zv example.com 80
Connection to example.com port 80 [tcp/hbci] succeeded!
Another option is curl, it is a powerful command line tool that can be used for a number of cases. It also supports a large number of protocols which includes telnet.
curl -vvv telnet://example.com:80
*   Trying 93.184.216.34:80...
* Connected to example.com (93.184.216.34) port 80 (#0)
Curl can also be used as a telnet client with the following command, you’ll need to provide the username and password. In my case the output isn’t particularly nice but it will do in a pinch.
curl --telnet-option TTYPE=vt100 telnet://example.com:23
user


461349fdd345 login: user

Password:
Welcome to Alpine!

The Alpine Wiki contains a large amount of how-to guides and general
information about administrating Alpine systems.
See <http://wiki.alpinelinux.org/>.

You can setup the system with the command: setup-alpine

You may change this message by editing /etc/motd.

whoami
461349fdd345:~$
^[[33;17R
461349fdd345:~$ whoami
user
^[[35;17R
Hopefully this guide will help get you up and running no matter if one of the alternative options helped or if you choose to install or build. You should be up and running within 10 minutes even if you build from source!
